
October is the start of the Rennaisance Festival here in Texas. If you've never been it's truly a magical experience. Almost every year they have several themed weekends and my favorite is the 1001 Dreams Fairy weekend.
Last year I made my costume and although it turned out cute, to me it seemed like it was "handmade", you know that feeling that you could have done some extra things to make it more professional looking, but you didn't? Well, this year I was determined that was not going to happen!
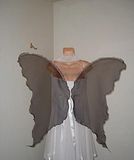
Well I knew I wanted a new corset but I was not in the mood to try to struggle to make one! If you have ever attempted this you know what I mean! So I went to eBay, I love eBay, and I found an awesome maker of fine corsets. Going by the name VonLancelot, these corsets are handmade and are breathtakingly gorgeous! Here's the one I bought, of course, I wore mine without the white shirt thingy underneath and I changed the blue ribbon to braided cord which gave it a more earthy feel, you know like a wood nymph, (see 3rd & 4th pics for braided lacing):
Front

Back

Lacing

Close up of Lacing

So I gathered my ideas, the corset and my money bag ...oops, I mean my husband, and headed to JoAnn's. Turns out he has a great eye for design! He helped me pick out all the materials I used for thee costume.
I knew the type of skirt I wanted but I wasn't sure how to go about making it so I did a search and found a really neat site: You Can Make This.com. I found the tutu skirt I was looking to make, found the instructions, downloaded them and here is my result:
The full tutu skirt

Close up of waistband

Next, because the tutu is see through, I needed an over skirt. This is where things got a little tricky for me. After numerous google searches using every word I could think of for jagged or ripped or torn edged skirts and turning up not one single usable pattern, I knew I was going to have to rely on my limited drawing talents. Luckily my hubby found the awesome blue sheened leather looking material that I used. So I took a white eyeliner pencil, yes I know they make chalk pencils for this but I need a smooth flow and the eyeliner did an awesome job, and I started drawing what I thought looked like a jagged edge. After cutting the first piece out with my cutter bee scissors so I could get all the smalls jags I drew, I had a template to use. And here is the result of the overskirt:
Overskirt

Closeup of jagged edge and material

Now I know by this point you are thinking, "Okay so she has used her cutter bee scissors but I don't see any other scrapping supplies being used." Remember I told you this year was going to be different, more realistic, truly fairylike. And a fairy is not complete without her wings!
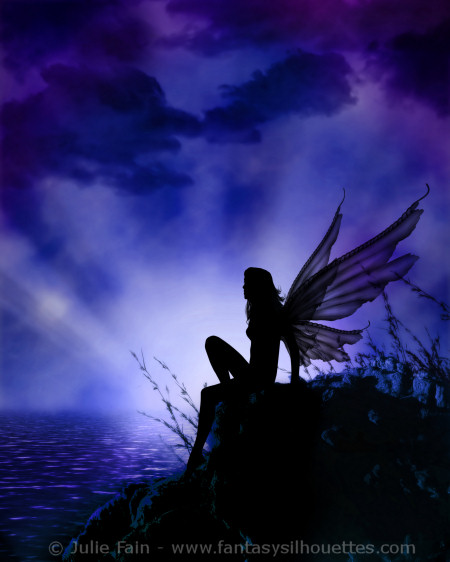
Last year I bought some gorgeous butterfly shapped wings, unfortunately, this is the best picture I was able to find that was close to them, although mine are white, or pearly irridesent to be exact.
And here is where the scrapping supplies came in handy. As you can see the wings are pretty but plain. So I decided to glam them up a bit. First, I had my amazing hubby use his artistic talents and draw the pattern on a large sheet of brown shipping paper. I didn't want the ink from the marker to get on my wings when I traced over it. So I covered the entire thing with wax paper and taped the wing down. Next I pulled out my stickles, some bling and some cool leaves I had bought for one of my fall scrapbok pages. After 2 and a half bottles of stickles in Patina, Lime Green, and Mermaid, numerous blue, green and clear bling crystals, and one package of leaves, I had created my dream wings! Here are the pics:
Full wing design

Close up of Wing design

Close up of Leaf pattern

Close up of curly design

Happy Scrapping!


7 comments:
wow, I love your creativity. I bet the costume came out truly awesome, i would love to see a finished product.
I am a huge fan of the renassiance festival, I have been to the Texas RenFaire a couple of times, but not nearly often enough, it is quite a long way away. There is a RenFest in Louisiana, unforunately it is not nearly as big or as grand as the Texas one and it is just not nearly the same.
Amazing! Great job!
Could you provide a link to this tutu skirt? I'm looking for on this page you gave and i can't find it :(
The tutu instructions can be found here: https://www.youcanmakethis.com/info/featured-products/No-Sew-Tutu-Instructions-Hair-Bows-and-Flip-Flops-Too.htm you will have to purchase the instructions from them, I think they are $7.99. Of cousre it's really easy to do on your own, take your elastic and lay it flat, next take your piece of tulle and fold it in half so there is a loop at the top. slide the loop end under the elastic. Then take the loop and pull the tulle through the loop hole. You'll want it to be tight but not bunching the elastic. Follow this until you are happy with the fullness of your tutu. Let me know if you need any more help.
Thank you so much. I'm not very good in English and I don't understand what should I do here- "Then take the loop and pull the tulle through the loop hole." Can you explain it to me again?
sorry for the confusion.
greetings, pyzaczu
Well a picture is worth a thousand words! And I hope this can help explain the instructions. http://www.gophotography.com/tutu/
Good luck and let me know how it turns out. :-)
I Agree with these beautiful pendants, these are slices from an agate geode with lots of sparkling druze crystals, The slice is has an attached bail. Inside the slice is a dangling natural point.
Regards:- Sandeep Sharma
for scrapbooking
It makes our lives more convenient,but also let more people become increasingly dependent,it is my idea for beautiful.
Regards:- Sandeep Sharma
scrapbook
Post a Comment